Search This Blog

Wednesday, May 25, 2011

THE THRIFTER'S MOTTO

Use it up
Wear it out
Make do
Or do without
~old depression era motto~

The weather has been glorious the week.  In the seventies, sunny  and breezy.  The perfect days for hanging out laundry on the clothesline.  I've been taking down the heavy insulated drapes and replacing them with the white Cape Cod style curtains.  Seeing their crisp, starched ruffles just fills my heart with joy.  Also, washed and starched some of the pretty linens that I've collected through the years from garage sales and thrift stores, replacing the more somber woven table runners that I use in the colder months.  Everything is looking so bright and cheerful.  So often I  see boxes of beautiful linens at auctions that someone was "saving" for special occasions.  The never get used.  Use your lovely things now.  Use them up and wear them out!  You'll always be able to get more at auctions because most people don't follow this credo.

While I was hanging my laundry, I noticed that I had quite a few towels that were looking the worst for wear, so I cut the good parts into washcloth sized squares and hemmed them on the sewing machine.  If you want to get fancy, you could hem them by hand or use a fancy stitch if your sewing machine has such things.The remainder of the scraps were put into the scrap bag.  The scrap bag and button box are old-fashioned ideas that should be revisited.  Before tossing out old clothes that are in too bad of shape to be donated to charity, check to see if there is anything that can be salvaged such as buttons or material.  Pretty fabrics are placed in one scrap bag that I use for making patchwork projects and doll clothes and even an occasional patch on a nightgown or work clothes.  The  uglier fabrics such as old t-shirts and stained fabrics are put into another bag for use around the house for dusting and wiping up spills.  I rarely use paper towels.  Old flannel diapers make the best dust cloths!  I've even considered buying a package of new ones just because they are so handy.  An old nightie that has become threadbare was repurposed  for dustrags.  If the fabric was in any better shape, it could have been salvaged to make a toddler sized nightgown.

I inherited  my grandmother's button box.  As a girl, we never purchased buttons.  It was much more fun to go through my grandmother's collection.  She salvaged them from anything she could get her hands on, even old military uniforms.  On a rainy day, my mother would keep me busy by making me sort buttons and stringing the sets together. 

Another make-do project for this week was these little trifles that I made from some Oreo-type cookies that had softened due to all the steam that we had from canning asparagus and rhubarb.  Just crumble the cookies and layer them with some whipped cream and a spoonful (or two!) of ice cream topping.  Placed in a pretty teacup and it's a dainty enough dish to set before the queen!

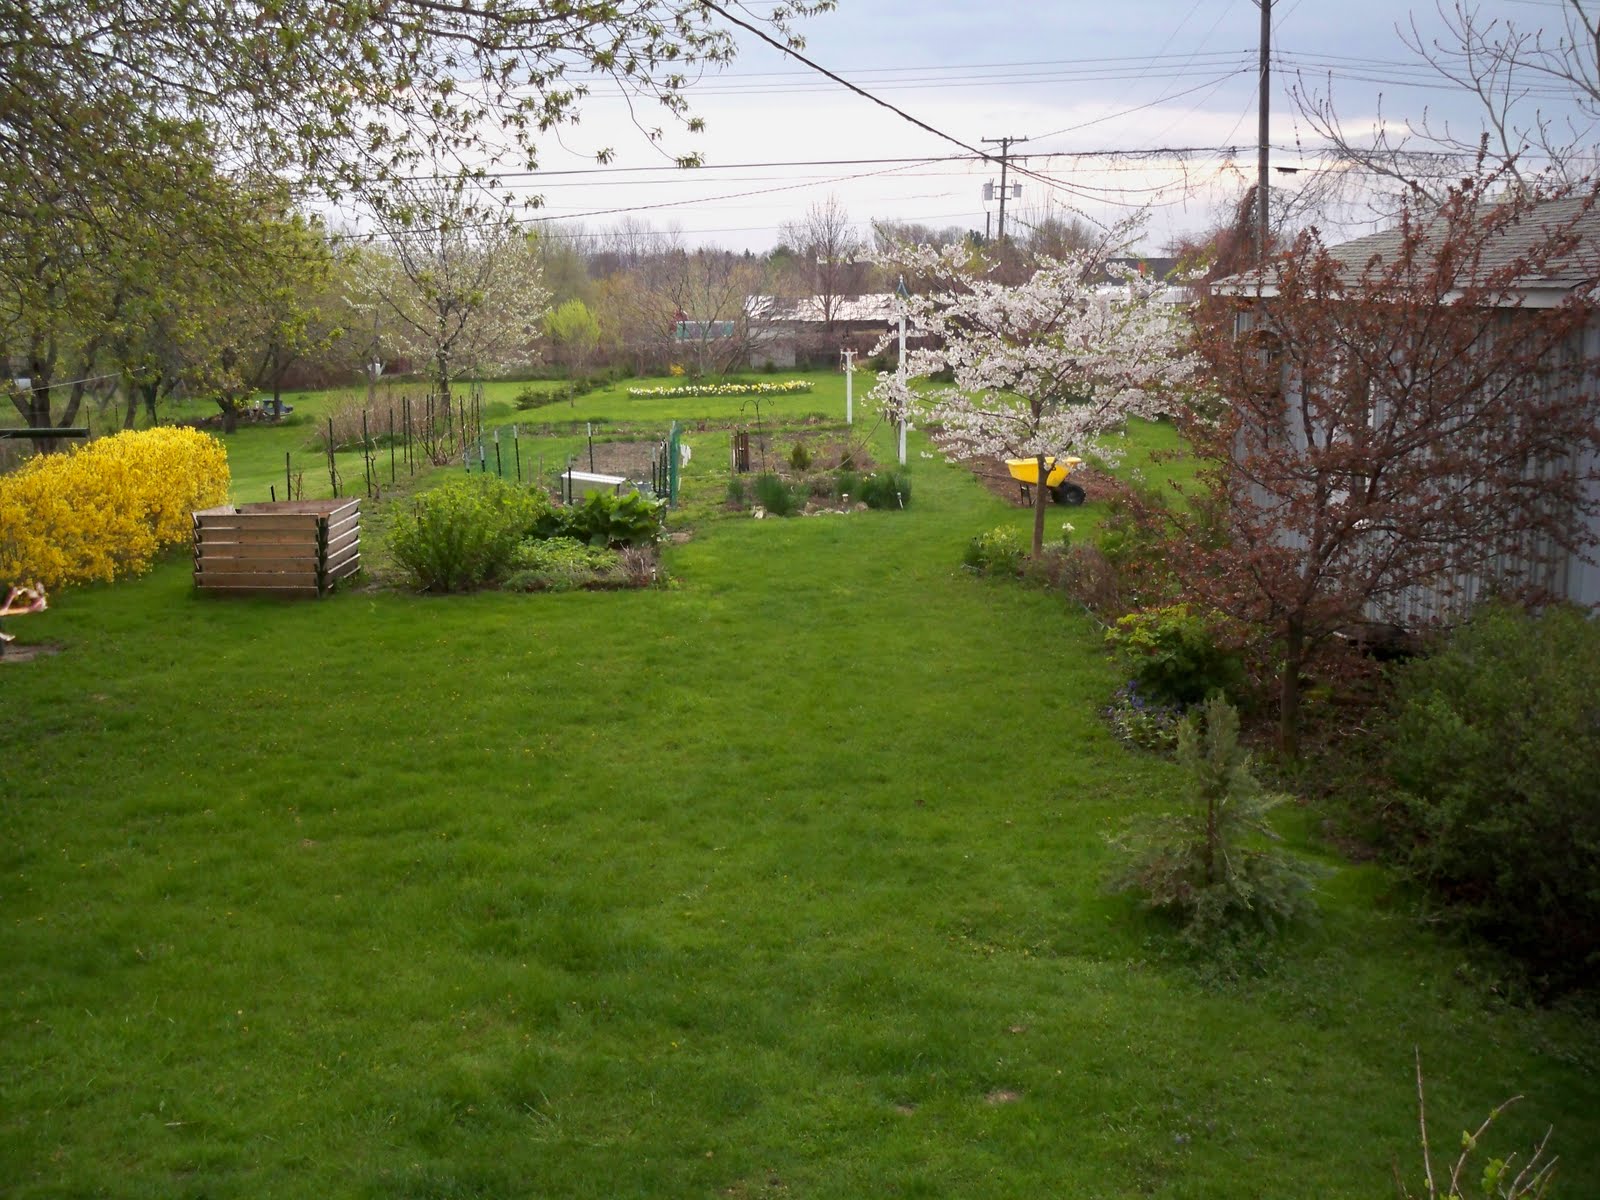
The picture at the top of the page is from my white garden.  I got the idea for this garden from The Little Woman Treasury by Carolyn Strom Collins.  Such a garden was created  in memory of Beth to symbolize all her sweetness  and innocence.  I wasn't sure how an all white garden would look, thinking it would be a tad bit boring, but I love it.  It is so restive and serene.  As other plants die out in the garden, I am replacing them with white and silver leafed ones.  I have a garden  behind my garage  where I plant all the freebies that I receive and those deeply discounted perennials  that are purchased at the very end of the season. Plus flowers  that are started from seed.  A true cottage garden.  When a white plant pops up, I tag it and replant it in the white garden in the fall.  It has certainly been a make-do week!

Thursday, May 19, 2011

THE TRIALS AND TRIBULATION OF RHUBARB


Dear House, you are very small.
Just big enough for love. That's all.
~ old sampler saying~

Today I had the bright idea to can up some rhubarb strawberry  pie filling...Well as in true Jane fashion,  the simple task wasn't accomplished without a lot of frustration.  I simply could not locate my canner.  How can a person lose a fairly large canner in a 1000 square foot house?  I looked in all the logical places, such as the basement and the attic.  Nothing! I suspect that it might be in the garage, but you must understand my dear husband's idea of organizing.  I love my husband with all my heart, but his one flaw is his need to pack things up.  Well that, and the fact that he's so chipper at the wee hours of the morning, but I digress.  He takes great pride in being able to fit the entire contents of a huge Victorian house into a u-haul.  Which makes unpacking an adventure.  All boxes will be  marked "misc."  And when you open them, you'll find that an understatement.  The contents being one of the boy's christening gowns, a spatula, a monkey wrench and a roll of toilet paper.  Another box might contain one shoe, an empty jar, a toilet plunger and a baggie filled with twist ties.  One good thing about his method is that it forces you to unpack. I'm betting that the canner is lurking behind  several old windows, a bed frame, and  several rolls of insulation out there in no-man's land, uh er, the garage.

But all's well that ends well.  I just canned up the jars in my pressure canner,  therefore, I had to use pint jars instead of quarts because the water wouldn't be deep enough for the quart jars.  But now that I think about it, that will work out better for us anyhow, since we rarely eat an entire pie anymore.  I'll be able to make small tarts with no waste.  Or maybe old-fashioned filled cookies.

Speaking of pies,  I always make up a large batch of pie crust and freeze it, that way it's easy to just thaw the crust when it's needed.  No excuse to not make a pie or tarts for tea. Or a quick potpie from the leftovers.  The recipe I use, stirs up quick and makes the nicest, flakiest crusts. And it really rolls out nicely.

Pie Crust (enough for  4 crusts)

1 lb. vegetable shortening
1 Tbsp. salt (I use less)
5 1/3 C. flour
1 C. water

Cut the shortening into the flour and salt.  I just use my hands to make pea-sized crumbles.  Stir in the water.  At this point, you are going to say to yourself, "Jane you're nuts!"  because the mixture will definitely be gluey.  Just pop it in the fridge for several hours and it will roll out beautifully.  Or divide the dough into fourths and freeze.

Monday, May 16, 2011

CHAT OVER THE GARDEN GATE

Hello everyone!  Hope you had a lovely weekend.  I had a glorious one!  On Saturday my son Erik and daughter-in-law Erin came for a visit.  They had a purpose in mind.  To tell Ran and I that we were going to be grandparents!  They were just glowing with joy!  A wonderful thing to behold.  Guess I'm getting thoroughly entrenched in the Grammy generation.  Our adorable little Tatianna just had her kindergarten entrance exam.

The above picture is of my garden.  Not much going on yet.  Right now I can look at it and see hope and promise.  In a couple more months all I will be able to see is chores that need to be finished.  Please ignore the long grass, we were letting it grow so that we could harvest dandelions.  Ever since I first spied the cover of  Joan E. Aller's cookbook, Cider Beans, Wild Greens and Dandelion Jelly, I have yearned to make a batch of dandelion jelly.   Here's a picture of mine.  Goodness!  My windows are dirty!  It never stops raining long enough to get them cleaned.  And when it does, there's so many other jobs that need attention outside, washing windows gets moved down the list.  Anyway,  the flavor of the jelly was a pleasant surprise.  It tastes like a mild lemony honey.  It will be great  in the winter  with biscuits.  As they say, summer in a jar.

I lost a lot of comments in my past three posts from Blogger's snafu. Such a shame because the best thing about this blog is the "conversations" that we have back and forth via the comments posts. Unfortunately,  some of the comments were from new commenters, that I was using to backtrack to their blogs.  That's what I get from procrastinating about putting their blogs on my favorites list.  When will I ever learn?

Speaking of procrastinating,  after Erik and Erin's announcement I dragged my scrap bag out of the attic and started working on a postage stamp crib quilt that I began over twenty years ago!  I might be a master of putting things off until tomorrow, but eventually I do finish my projects, even if it does take me two decades!  I'm hoping that by posting this project, you will all help keep me on track by shaming me into finishing it.

Wednesday, May 11, 2011

AH! ASPARAGUS!


Are you casting asparagus on my cooking?
~Curly Howard~

One of the first things we did when we bought this little cottage was to put in an asparagus bed.  Growing asparagus is a lesson in patience.  In typical Ran and Jane fashion, we went overboard and planted about ninety crowns, but for most people a couple of dozen plants should suffice.  Just plant the crowns in the spring in good enriched soil about a foot apart for each crown. 

Now the patience part comes into play.  The first year you must restrain yourselves from picking any of those wonderful green stalks.  The second year, only pick one third of them.  But on the third year, you can go hog wild and pick to your heart's content.  I guarantee,  you'll get sick of the stuff before you exhaust your supply

To care for the plants, we lay newspaper down in the spring to keep out the weeds, then cover it with composted manure.  Leave the plants until the fall, then cut back the foliage.  But I like to keep them well into winter, because they look pretty in the frost.  Don't cut them back to soon, because the foliage strengthens the plants, just like tulips and daffodils.

Our favorite way to  prepare it, is to simply drizzle olive oil over the stalks and sprinkle them with our own herbes de provence (garlic powder and rosemary will do in a pinch) and salt.  Roast in a hot oven, or even better grill them until they are tender.

Spent a pleasant afternoon yesterday, canning fourteen pints up.  To can asparagus, clean the stalks and cut them into desired size.  In large pot, cover the asparagus with water and bring to a boil; simmer 10 minutes.  Pack into hot sterilized pint jars, adding 1/2 tsp. salt to each jar.  Wipe down the rims and place sterilized lids on; screw on the rings.  Process for thirty minutes at ten pound of pressure.  Easy peasy!

Monday, May 9, 2011

BIRCH BARK MITTENS

One could do worse than be a swinger of birches.
~Robert Frost~ 


Birch trees hold a special place in my heart.  They remind me of home. And my childhood, where I'm ashamed to say, I would peel off the bark and make little canoes for my dolls that I floated down the stream in the nearby woods. Whenever I mention that I'm from Michigan, someone always will say, "Oh It's so pretty there, with all those birch trees." or something in that train of thought.  My sister used to work at Fort Mackinac and she heard more questions about the birch trees than the history of the colonial fort.  I guess their beauty tugs at everyone's hearstrings. So when I saw the pattern for these Birch mittens in the Piecework Jan./Feb. 2010 issue, they went onto my ever-expanding list of must-knit patterns.  Since, the colourway of the yarns was so important to the overall pattern, I decided I better get on with it, while the yarn was still available.  There was only one mail order source for the Norwegian yarn, so I had to wait patiently for the yarn to arrive.  After receiving the yarn, I sat down to knit, only to discover that the pattern took size zero double-pointed needles, which I couldn't locate in any of the local yarn shops.  So another wait  for the mailman to deliver the needles.  Such is life! Thank goodness for the internet!  They're slow knitting as you have to juggle all those bobbins of colours, or maybe it's just me.  I'm not a speedy knitter.  But the end result is looks wonderfully folkloric.  I finished them with the old Norwegian way of sewing seams together.  I do that often on socks.  Think it gives them an old-world look.  By the way,I thought this pattern was a lot more complicated than it needed to be.  Whatever happened to the old-fashioned knitting instructions that went line by line?  And when did it become the "thing" to use five double-pointed needles instead of four?  So you have to buy two packages of needles?  


Thursday, May 5, 2011

FIELDS OF GOLD


And then my heart with pleasure fills
And dances with daffodils
~William Wordsworth~

For the last couple of years, I've purchased a hundred daffodil bulbs and planted them in the orchard.  The cost is minimal, about the price of a single bouquet, if you buy them at a big box store.  My plan is to eventually have the entire back fourty covered in  golden blooms.  It does indeed fill my heart with pleasure.  All the instructions on naturalizing daffodils say to toss the bulbs in the air and then plant them.  It don't think my wrist could hold up to that much digging!   I just dig a trench  and plant them there, in  a half circle around the ancient mound that has sprung a sumac.